How to Create and encrypt a Windows virtual machine?
This tutorial will help you to gain insights to How to Create and encrypt a Windows virtual machine. Azure virtual machines (VMs) can be created through the Azure portal. The Azure portal is a browser-based user interface to create VMs and their associated resources. In this quickstart, you will use the Azure portal to deploy a Windows virtual machine, create a key vault for the storage of encryption keys, and encrypt the VM.
First of all, Sign in to the Azure Portal
Creating a virtual machine
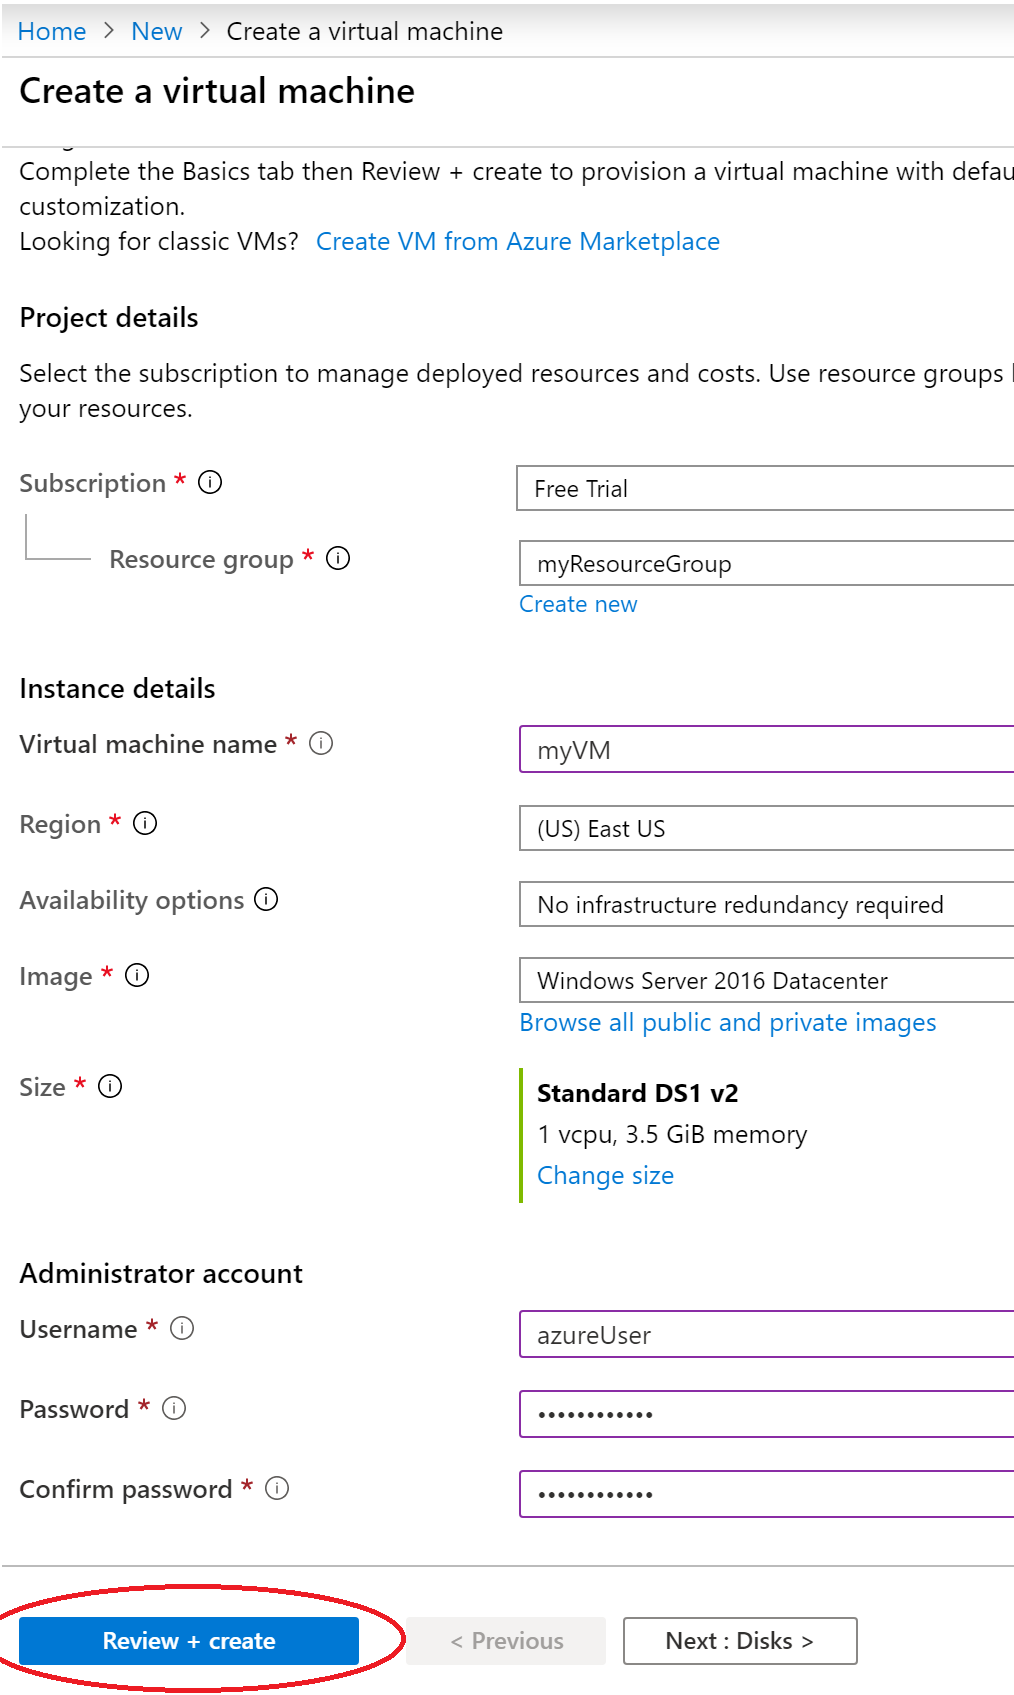
- Firstly, Choose Create a resource in the upper left corner of the Azure portal.
- Furthermore, In the New page, under Popular, select Windows Server 2016 Datacenter.
- In the Basics tab, under Project details, make sure the correct subscription is selected and then choose to Create new resource group. Enter myResourceGroup as the name.
- Subsequently, For Virtual machine name, enter MyVM.
- For Region, select the same region you used when making your key vault above (e.g., East US).
- Also, Make sure the Size is Standard D2s v3.
- Under Administrator account, select Password. Enter a user name and a password.
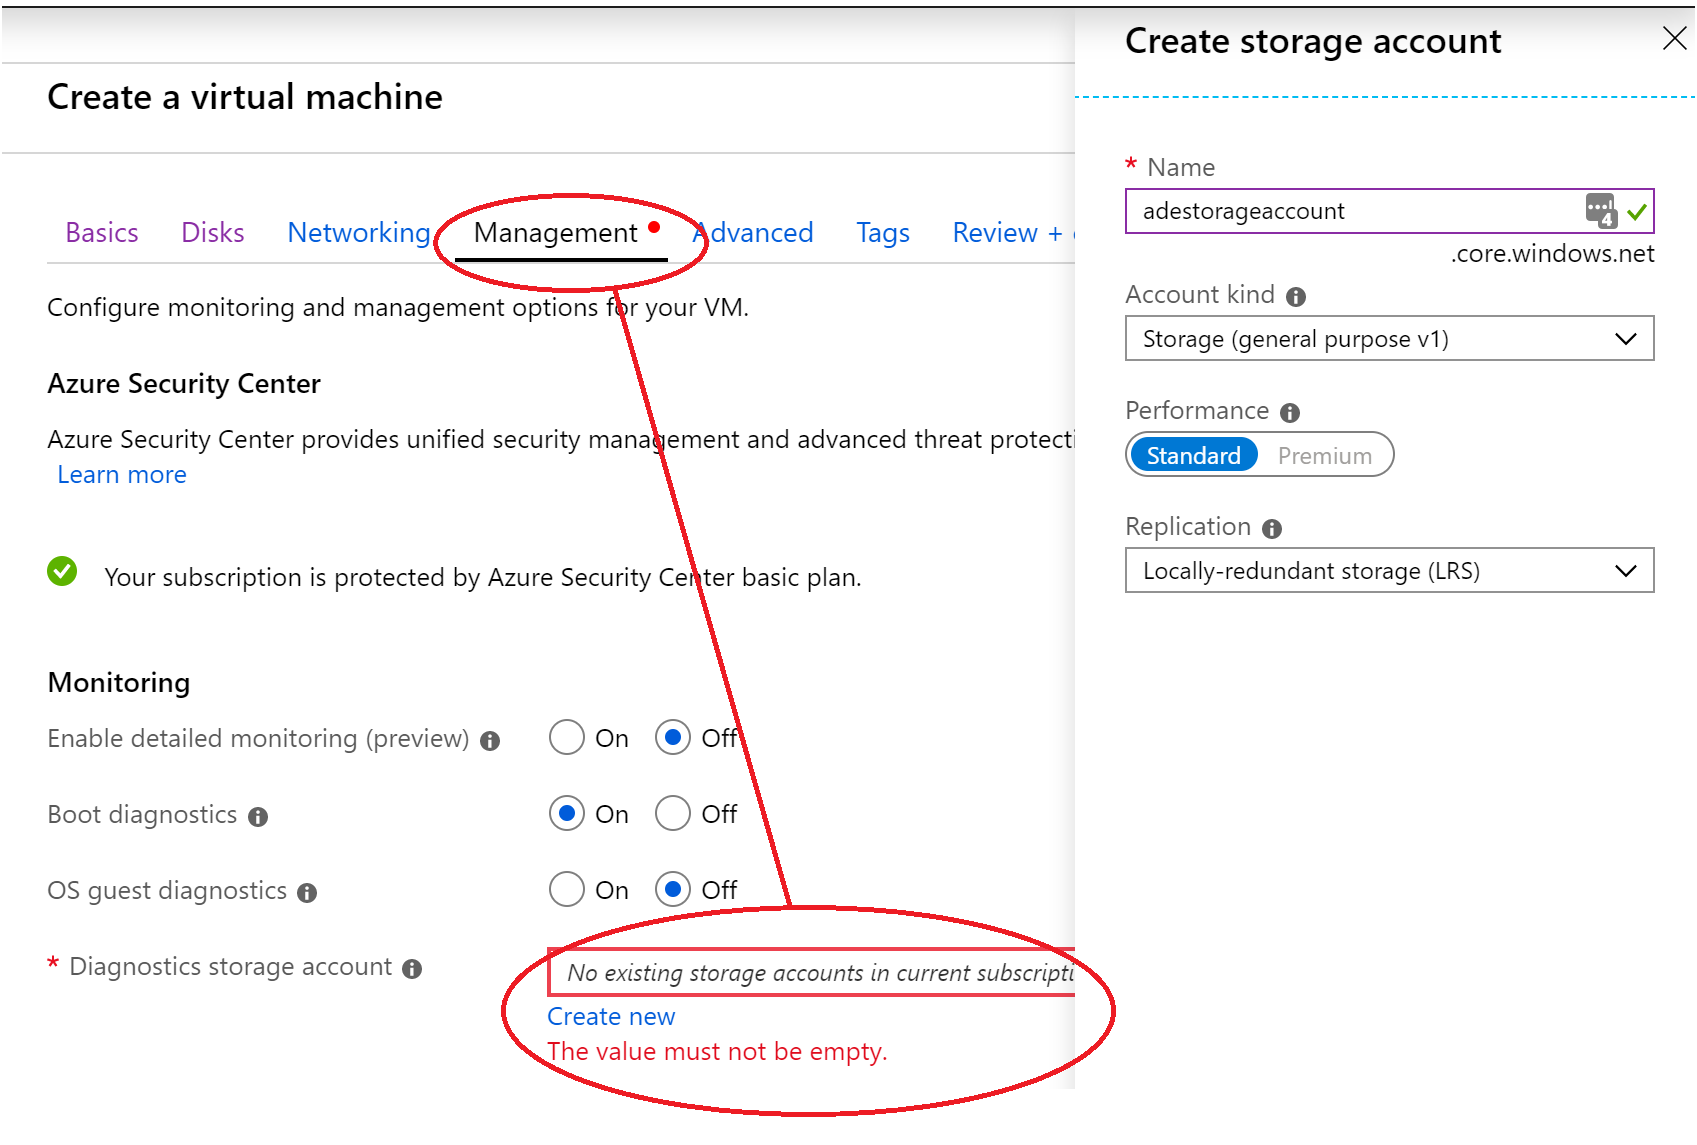
Select the “Management” tab and verify that you have a Diagnostics Storage Account. If you have no storage accounts, select “Create New”, give your new account a name, and select “Ok”
- Click “Review + Create”.
- On the Create a virtual machine page, you can see the details about the VM you are about to create. When you are ready, select Create.
It will take a few minutes for your VM to be deployed. When the deployment is finished, move on to the next section.
Learn to Encrypt the virtual machine
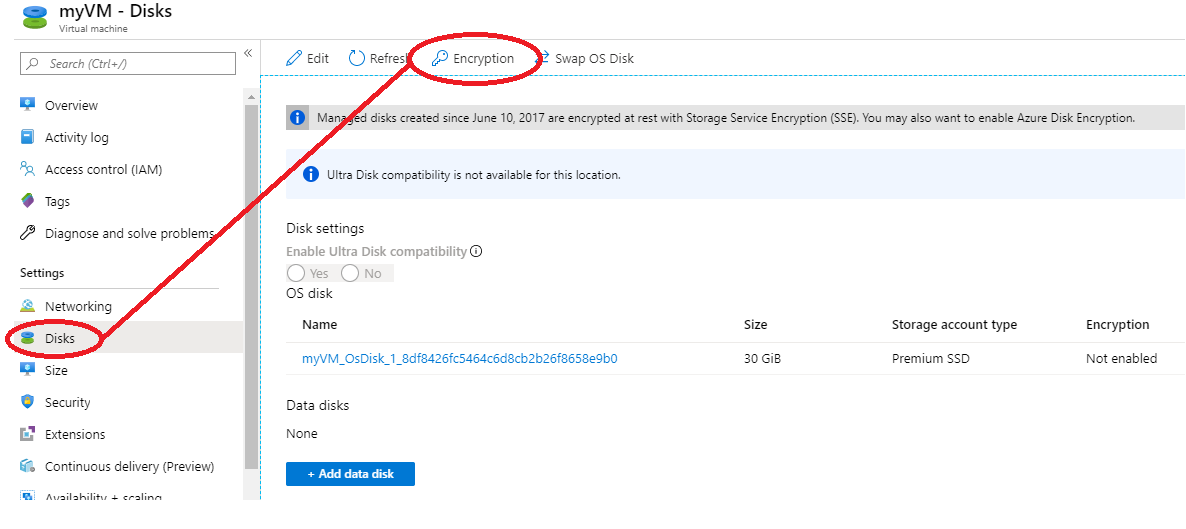
- Firstly, When the VM deployment is complete, select Go to resource.
- On the left-hand sidebar, select Disks.
- Subsequently, On the Disks screen, select Encryption.
- On the encryption screen, under Disks to encrypt, choose OS and data disks.
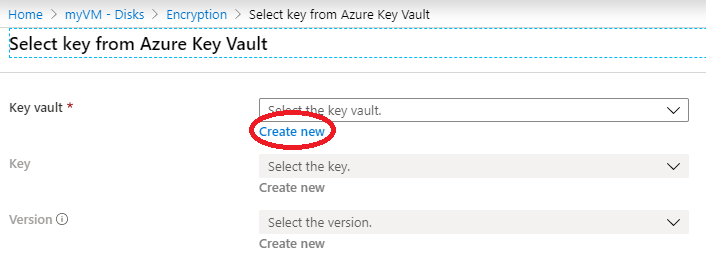
- Under Encryption settings, choose Select a key vault and key for encryption.
- On the Select key from Azure Key Vault screen, select Create New.
- On the Create key vault screen, ensure that the Resource Group is the same as the one you used to create the VM.
- Give your key vault a name. Every key vault across Azure must have an unique name.
- On the Access Policies tab, check the Azure Disk Encryption for volume encryption box.
- On the Create key vault screen, ensure that the Resource Group is the same as the one you used to create the VM.
- Furthermore, Give your key vault a name. Every key vault across Azure must have an unique name.
- Finally, On the Access Policies tab, check the Azure Disk Encryption for volume encryption box.

Reference documentation – Quickstart: Create and encrypt a Windows virtual machine with the Azure portal